
시작하며
먼저 Selenium으로 Web Crawling을 진행하는 과정에 있어 이번 학기 UROP에 감정사전이란 주제를 정하며 리뷰 데이터를 Crawling하여 전처리를 하는 목적이 있어 Selenium 으로 crawling을 진행해봤습니다. 공부하며 배운 내용들을 적어가는 과정이라 부정확할 수도 있다는 점 양해하며 봐주시면 감사하겠습니다.
Selenium이란?
selenium은 웹사이트 테스트를 위한 도구로 사용되어 브라우저 동작을 자동화할 수 있습니다. 셀레니움을 이용하는 웹크롤링 방식은 프로그래밍으로 브라우저 동작을 제어해서 마치 사람이 이용하는 것 같이 웹페이지를 요청하고 응답을 받아올 수 있습니다.
환경세팅
먼저 Selenium 을 사용하기 위해선 드라이버가 필요합니다. 저는 Chrome을 기반으로 하여 Crawling을 진행하였습니다.
오른쪽 위 상단에 ...버튼을 누르면 도움말을 보실 수 있으실 겁니다. 도움말 클릭후 Chrome정보를 누르면 현재 사용하는 chrome버전을 확인 할 수 있습니다.
https://chromedriver.chromium.org/downloads
ChromeDriver - WebDriver for Chrome - Downloads
Current Releases If you are using Chrome version 107, please download ChromeDriver 107.0.5304.18 If you are using Chrome version 106, please download ChromeDriver 106.0.5249.61 If you are using Chrome version 105, please download ChromeDriver 105.0.5195.52
chromedriver.chromium.org
이후 해당 사이트에 들어가서 현재 chrome 버전에 맞는 드라이버를 다운받습니다.이후 다운받은 드라이버 파일을 만들고자 하는 python file에 같은 경로로 옮깁니다.
def set_chrome_driver(): # chrome driver 초기 세팅

    options = webdriver.ChromeOptions()
    options.add_argument("--disable-blink-features=AutomationControlled")

    options.add_experimental_option("excludeSwitches", ["enable-automation"])
    options.add_experimental_option("useAutomationExtension", False)
    options.add_experimental_option("prefs", {"prfile.managed_default_content_setting.images": 2})
    driver = webdriver.Chrome(executable_path='/Users/sunho99/PycharmProjects/python_Project/selenium_project/chromedriver', options=options)
return driver이후 초기 selenium driver 세팅을 합니다. 위 함수형식을 사용하지 않고 그냥 일반적인 code 형식으로 작성하셔도 됩니다. 이후 개발자 모드로 들어가서 누르고자 하는 버튼 또는 검색하고자 하는 검색창을 찾습니다.
위 왼쪽 상단의 마우스 모양을 통해 보다 쉽게 Tag을 구합니다.
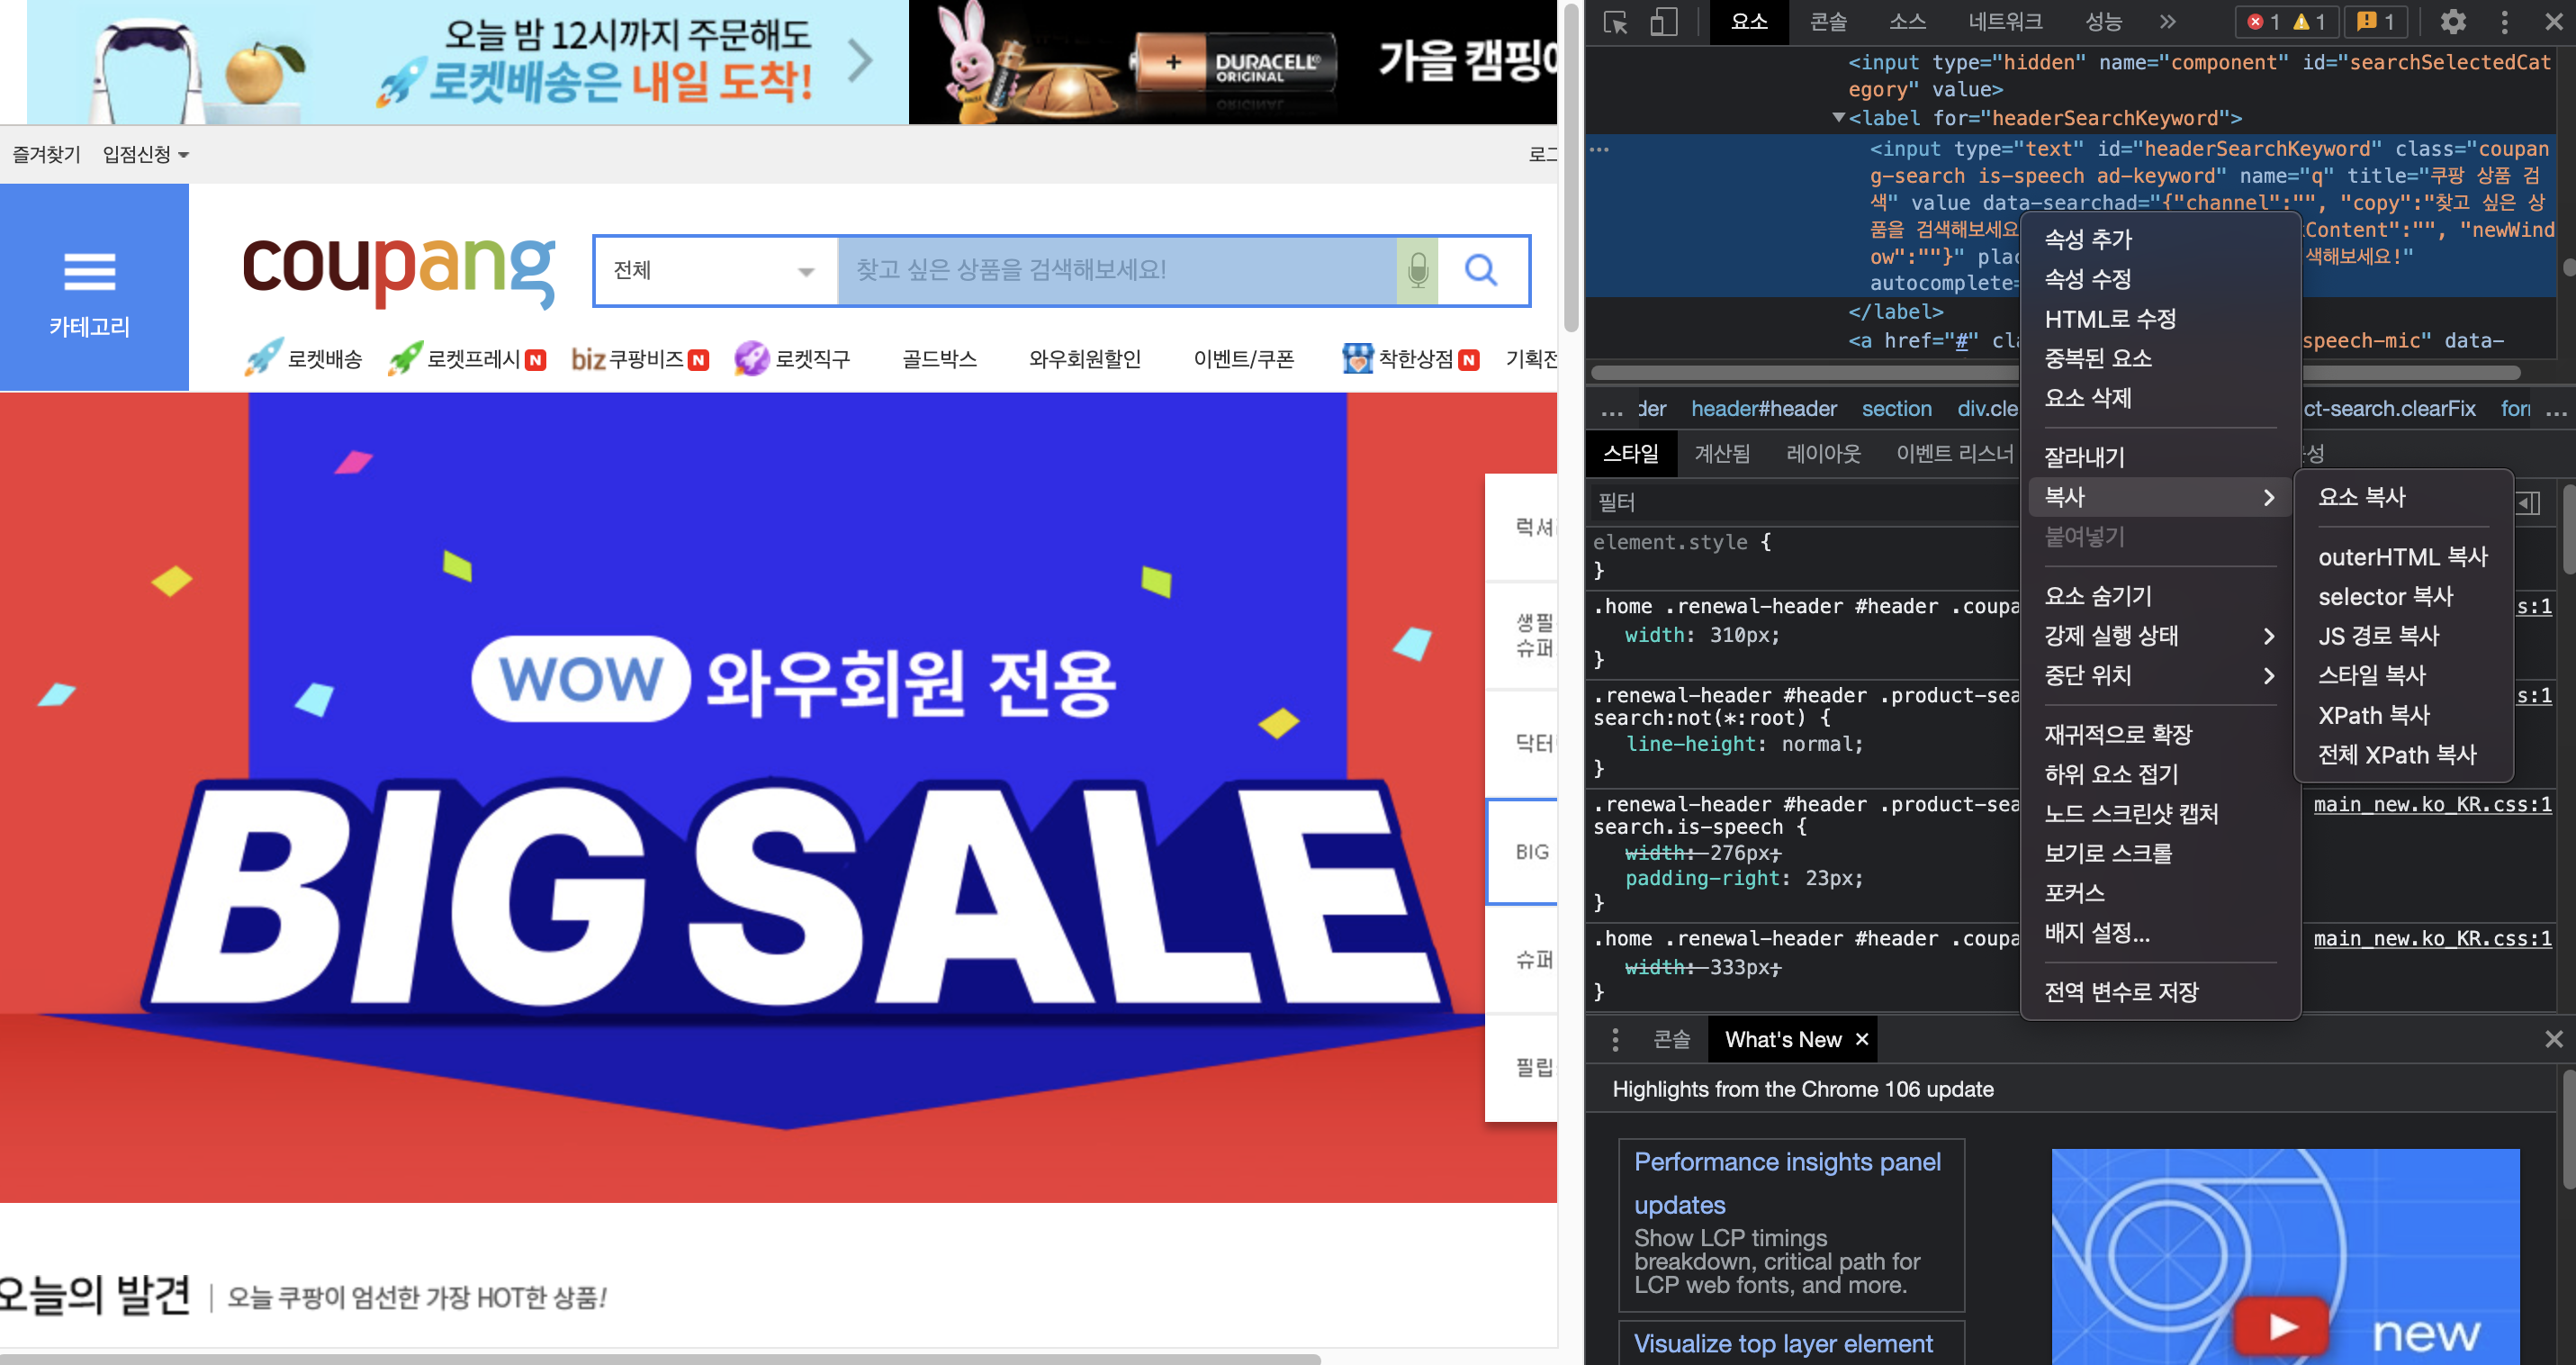
예를 들어 검색창 tag를 구하고자 하면 위 방식을 통해 tag를 구한 후 복사 버튼을 눌러 전체 Xpath경로를 복사합니다.
driver.find_element(By.XPATH,'/html/body/div[3]/div/header/section/div/div/form/fieldset/a').click() # 검색창 클릭
이후 driver.find_element를 통해 해당 버튼을 클릭할 수 있도록 합니다.
from selenium.webdriver.common.by import By

driver.find_element(By.XPATH, '//button[text()="Some text"]')
driver.find_element(By.XPATH, '//button')
driver.find_element(By.ID, 'loginForm')
driver.find_element(By.LINK_TEXT, 'Continue')
driver.find_element(By.PARTIAL_LINK_TEXT, 'Conti')
driver.find_element(By.NAME, 'username')
driver.find_element(By.TAG_NAME, 'h1')
driver.find_element(By.CLASS_NAME, 'content')
driver.find_element(By.CSS_SELECTOR, 'p.content')

driver.find_elements(By.ID, 'loginForm')
driver.find_elements(By.CLASS_NAME, 'content')위 사용 방식들을 통해서 원하고자 하는 Tag_name, CSS_Selector,xpath 등을 사용할 수 있습니다.
from selenium import webdriver

from selenium.webdriver.common.keys import Keys
from selenium.webdriver.common.by import By
import time

options = webdriver.ChromeOptions()
options.add_argument("--disable-blink-features=AutomationControlled")

options.add_experimental_option("excludeSwitches", ["enable-automation"])
options.add_experimental_option("useAutomationExtension", False)
options.add_experimental_option("prefs", {"prfile.managed_default_content_setting.images": 2})
driver = webdriver.Chrome(executable_path='/Users/sunho99/PycharmProjects/python_Project/selenium_project/chromedriver', options=options)


url = 'https://www.coupang.com/'
driver.get(url=url)
time.sleep(2)
search_input = driver.find_element(By.XPATH,'//*[@id="headerSearchKeyword"]')
search_input.send_keys("%s" % "신라면")

driver.find_element(By.XPATH,'/html/body/div[3]/div/header/section/div/div/form/fieldset/a').click()  # 검색창 클릭

driver.find_element(By.XPATH,'/html/body/div[3]/section/form/div[2]/div[2]/ul/li[1]/a/dl/dt/img').click()  # 이미지 클릭
time.sleep(2)
driver.switch_to.window(driver.window_handles[-1])  # 새 팝업창으로 스위칭
time.sleep(5)
for i in range(10):
    driver.find_element(By.TAG_NAME,value="body").send_keys(Keys.PAGE_DOWN)  # 내리기
    time.sleep(2)


def review_crawling():
    page_text = ""
    for i in range(5):
        text = driver.find_element(By.CLASS_NAME,
                                   value="sdp-review__article__list__review.js_reviewArticleContentContainer").text
        page_text += text + "\n"
        review = driver.find_element(By.CLASS_NAME, value = "sdp-review__article__list__survey").text
        time.sleep(2)
        page_text += review + "\n"
    time.sleep(2)
    return page_text

total_text = ""기본적으로 지금 짜놓은 코드는 쿠팡에서 검색란에 신라면을 검색한 후 자동으로 검색창을 눌러 다음 페이지로 넘어갑니다. 이후 해당 페이지에서 첫번째 이미지란을 눌러 상품란으로 넘어갑니다. 이때 주의해야 할점이 있습니다. 쿠팡 사이트 경우 이미지를 누르면 새로운 팝업창이 생기기 때문에 팝업창을 새롭게 스위칭 해줘야 합니다.
driver.switch_to.window(driver.window_handles[-1]) # 새 팝업창으로 스위칭이때 해당 코드를 통해 제일 최근에 새롭게 생긴 팝업창으로 switching을 진행합니다. 이후 쿠팡 리뷰같은 경우에는 해당 상품페이지에서 스크롤을 해야 네트워크를 통해 리뷰목록을 가져오게 됩니다.
for i in range(10):
    driver.find_element(By.TAG_NAME,value="body").send_keys(Keys.PAGE_DOWN)  # 내리기
time.sleep(2)해당 코드를 통해 10번정도 페이지를 내리면서 리뷰목록들을 불러올수 있도록 진행합니다. 중간 중간 sleep()을 넣어준 이유는 너무 빠르게 진행하다보면 쿠팡에서 트래픽이 과다하게 들어와 deny를 할 수 있기 때문에 넣어줬습니다.
이후 추가적으로 원하고자 하는 리뷰들을 크롤링하여 진행 하시면 되겠습니다.
'Big data > Data mining' 카테고리의 다른 글
| Apriori Algorithm(연관규칙분석) 이란? (0) | 2022.08.10 |
|---|---|
| [Python] split-folders 폴더 나누기 (0) | 2022.07.13 |
| Bloom filter (블룸 필터)란? (0) | 2022.06.30 |